In this article, we will discuss how to create a new lease agreement. Let's assume that you have found a new tenant and decided to enter into a lease with them. To do this, you need to create a lease in the system by filling in the main fields and tabs of the lease card.
It is important to pay attention to some crucial
points that I will elaborate on further.
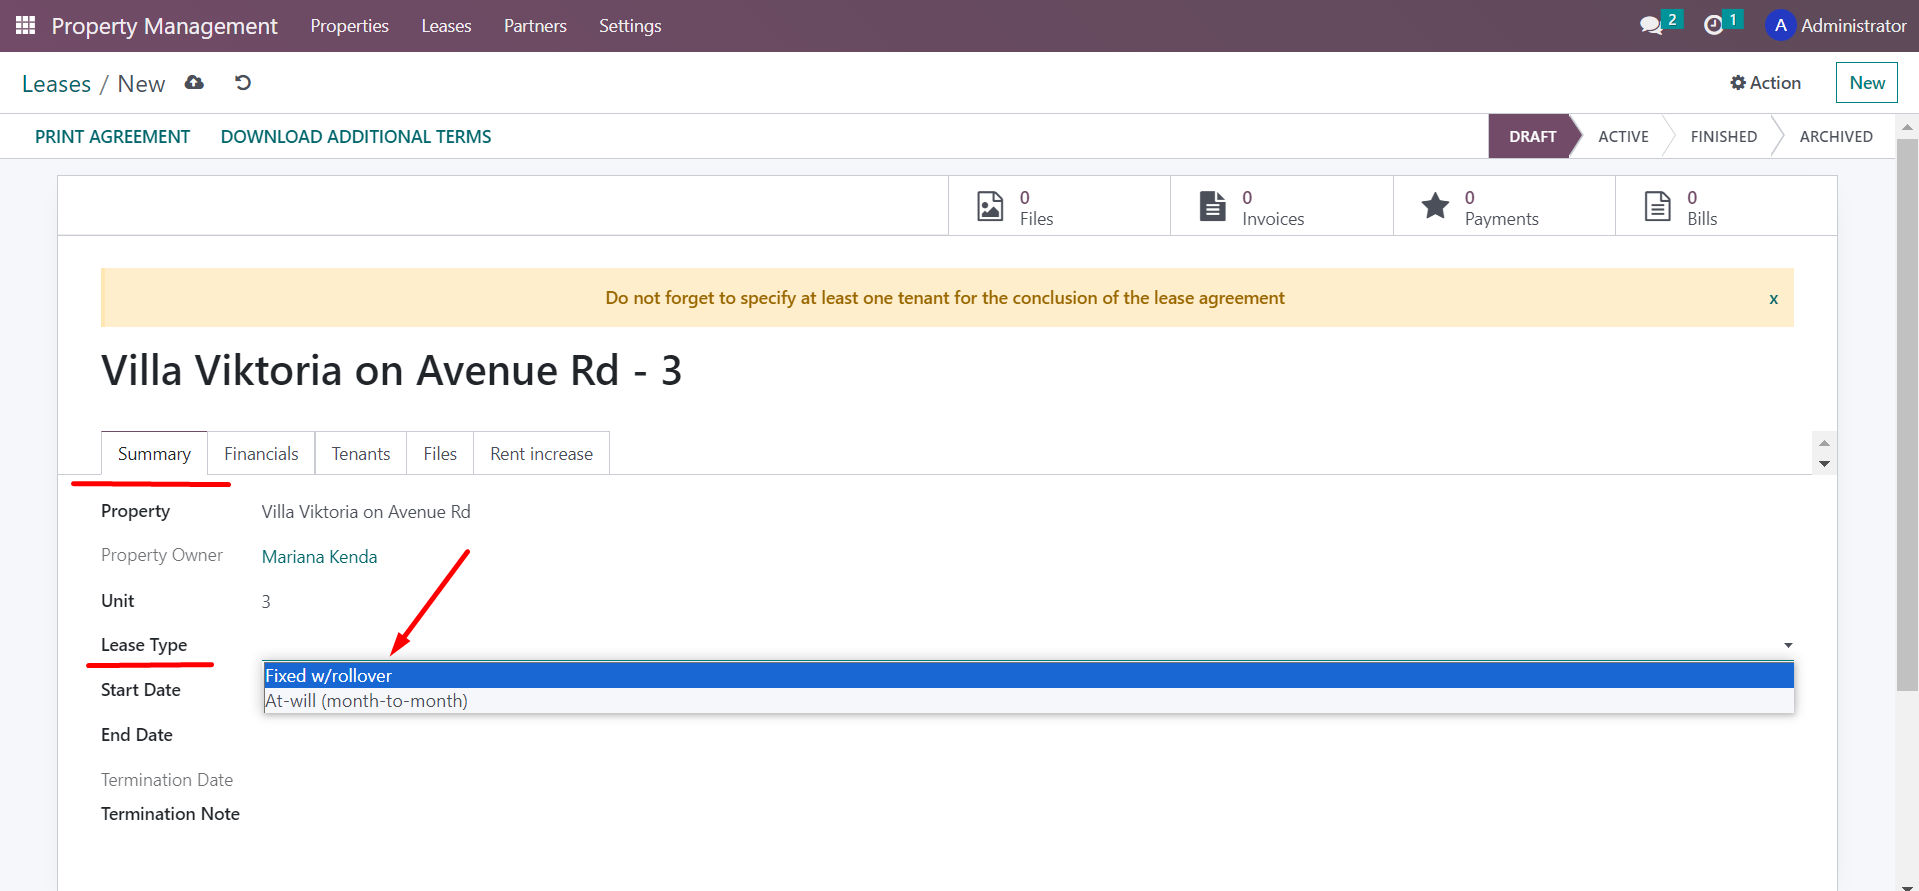
Summary Tab
In the Summary tab, we need to enter the lease Type as Fixed w/rollover, which complies with Ontario law. Once the fixed annual term expires, the lease type will change automatically.
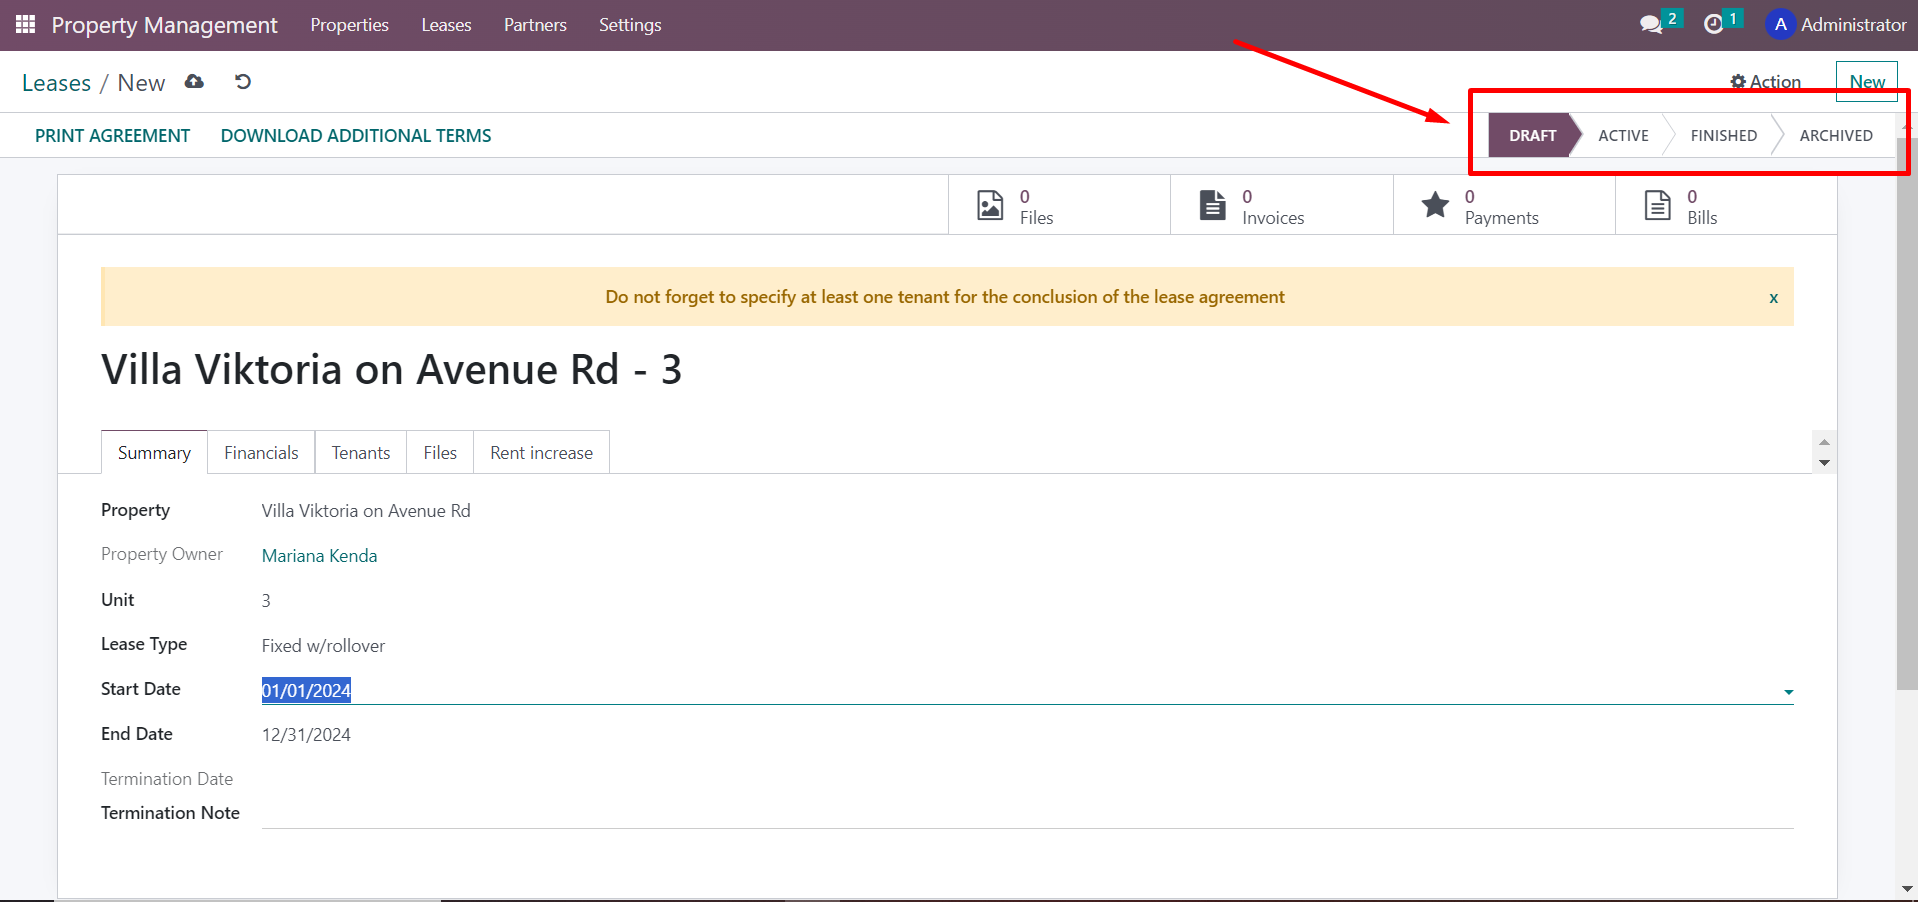
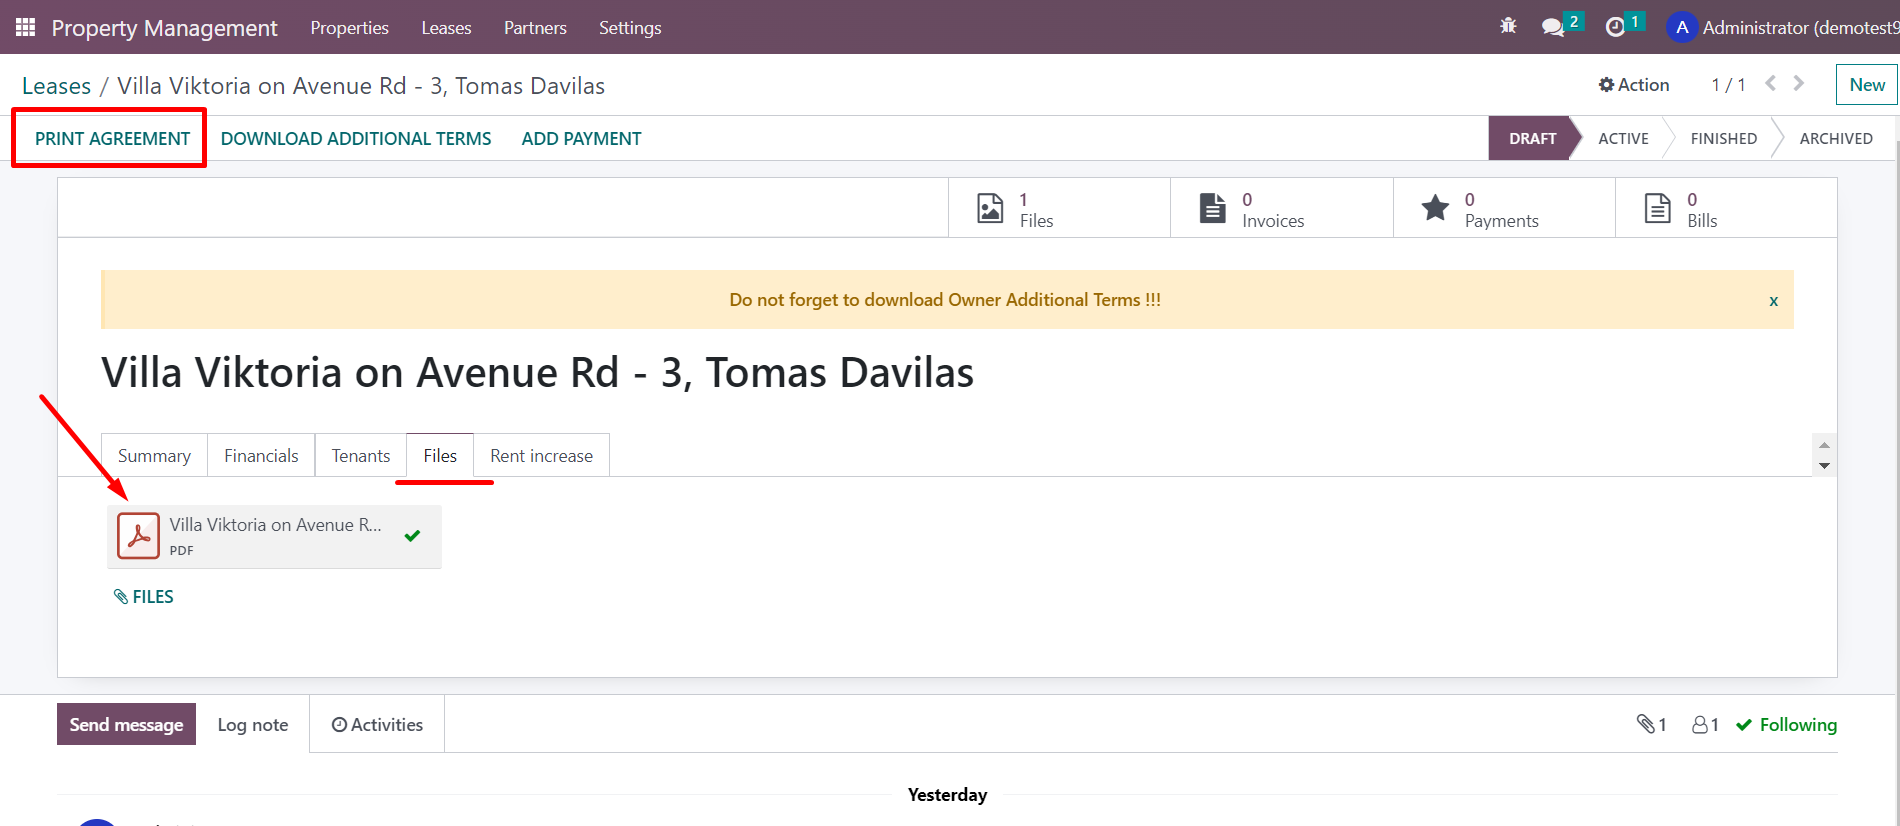
The current status of a lease is indicated within each lease. The lease can have one of the following statuses:
· Draft: This means that the contract is still being prepared or negotiated.
· Active: This status indicates that the lease has been signed and is currently in effect.
· Completed: When a lease enters this status, it means that the tenant has already vacated the property. However, financial transactions can still be carried out under this lease, such as conducting final settlements with the tenant.
· Archived: This is the final status of a lease and is assigned when the tenant has moved out, and all financial transactions under the lease have been completed. At this point, the lease is sent to the archive.
A single unit can only have one active lease at a
time. However, it is possible to enter into another lease for the same unit if
the termination date of the current tenant's eviction is specified, and the new
lease begins after that date. This helps prevent accidental user errors and
avoids any unpleasant situations that may arise as a result of such errors.
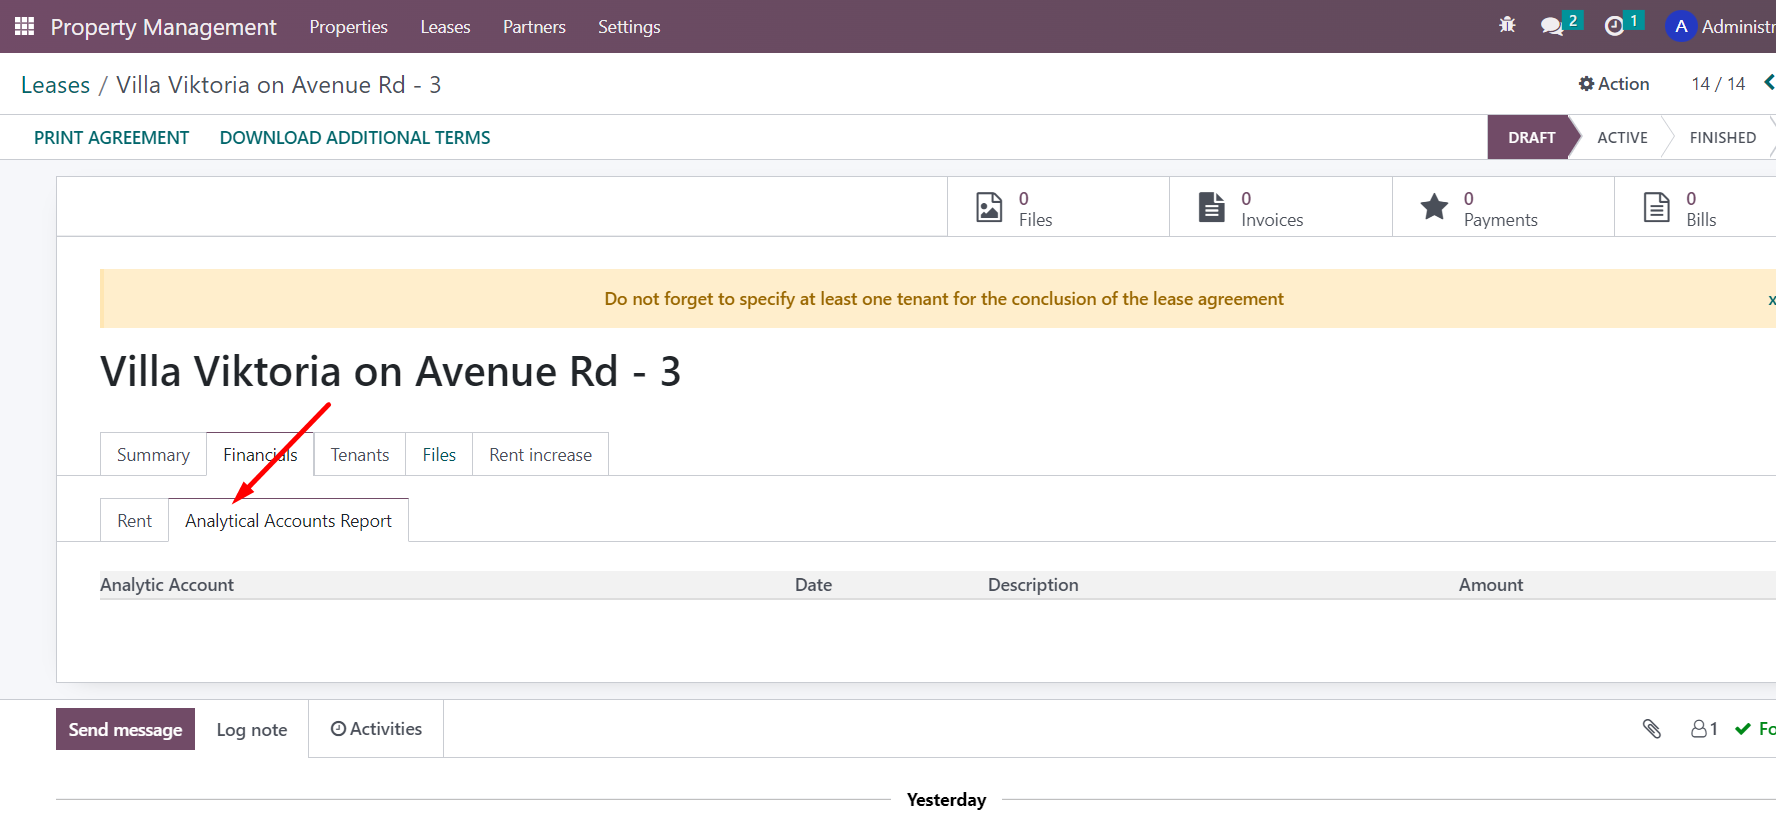
Financials Tab
There are two subtabs as we can see: Rent tab and Analytic Accounts Report tab.
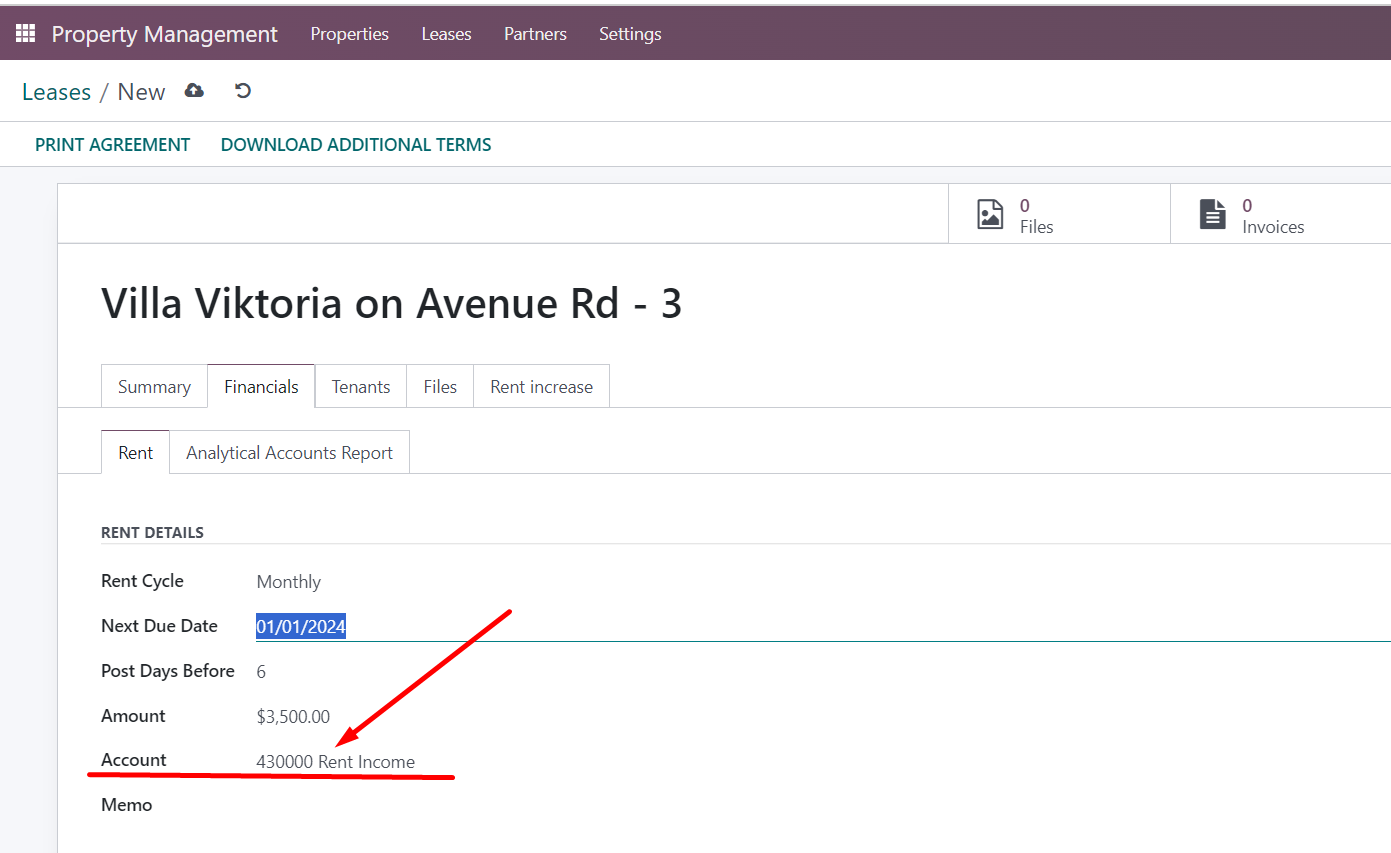
Rent Tab
On
the Rent tab, there are a few
important things to keep in mind
Firstly, you must fill in the "Frequency of payments" field, as the system generates invoices automatically based on the frequency specified in this field. Secondly, you need to specify the Due Date for the first payment, and the dates of subsequent payments will be calculated and updated automatically.
If you prefer to
receive invoices a few days before the Due Date, you can easily set this option
in the general system settings. However, if you need to generate invoices
sooner or later for a specific lease agreement, you can manually edit them in the
agreement itself.
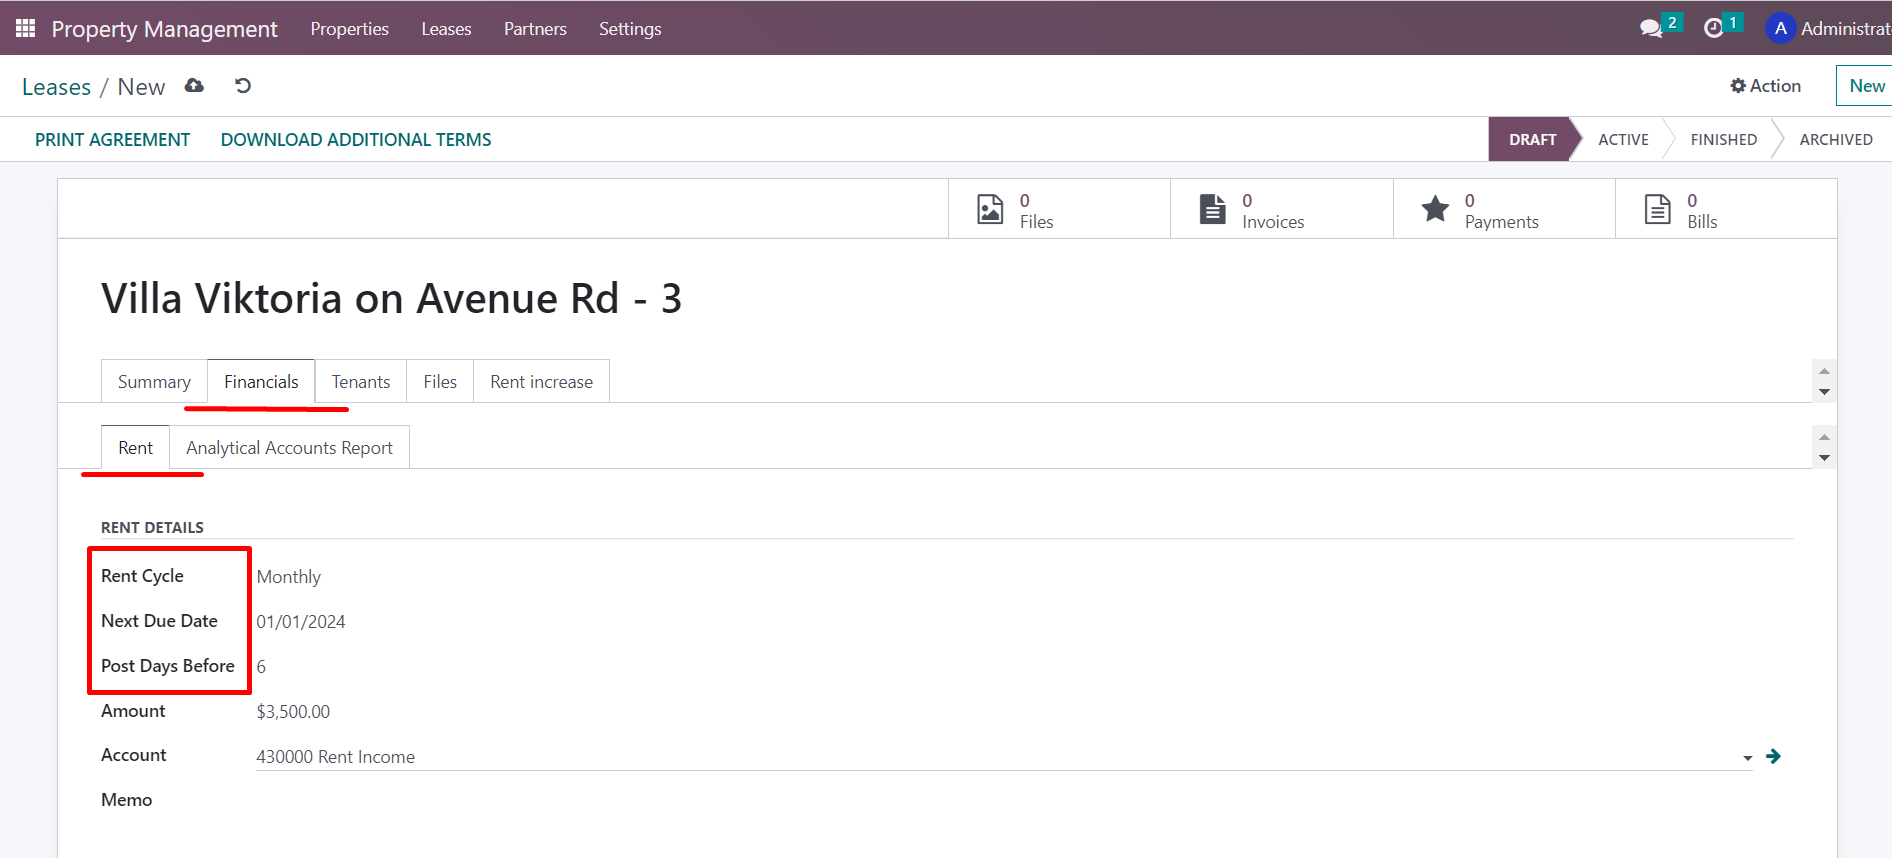
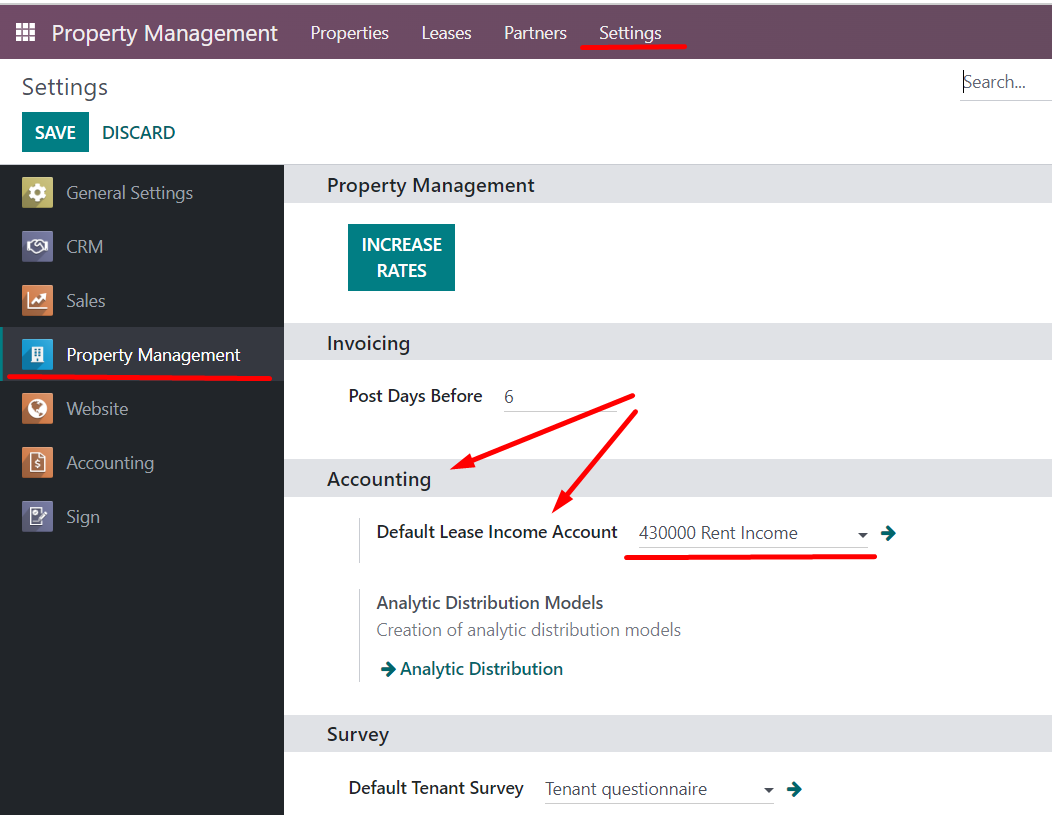
You have the option to specify in the general settings
the accounting account to which the rent payment should be assigned. This
information will then be automatically inserted into the lease card and
subsequently into the invoices. However, you can manually change this
information if needed.
To make things easier and save time for users, our system provides a pre-made list of additional payments that tenants make either monthly or as a one-time payment. This list can be used to automatically fill in the necessary fields when creating a lease card. However, these fields can also be edited manually if required. Additionally, the list of additional payments can be expanded if necessary.
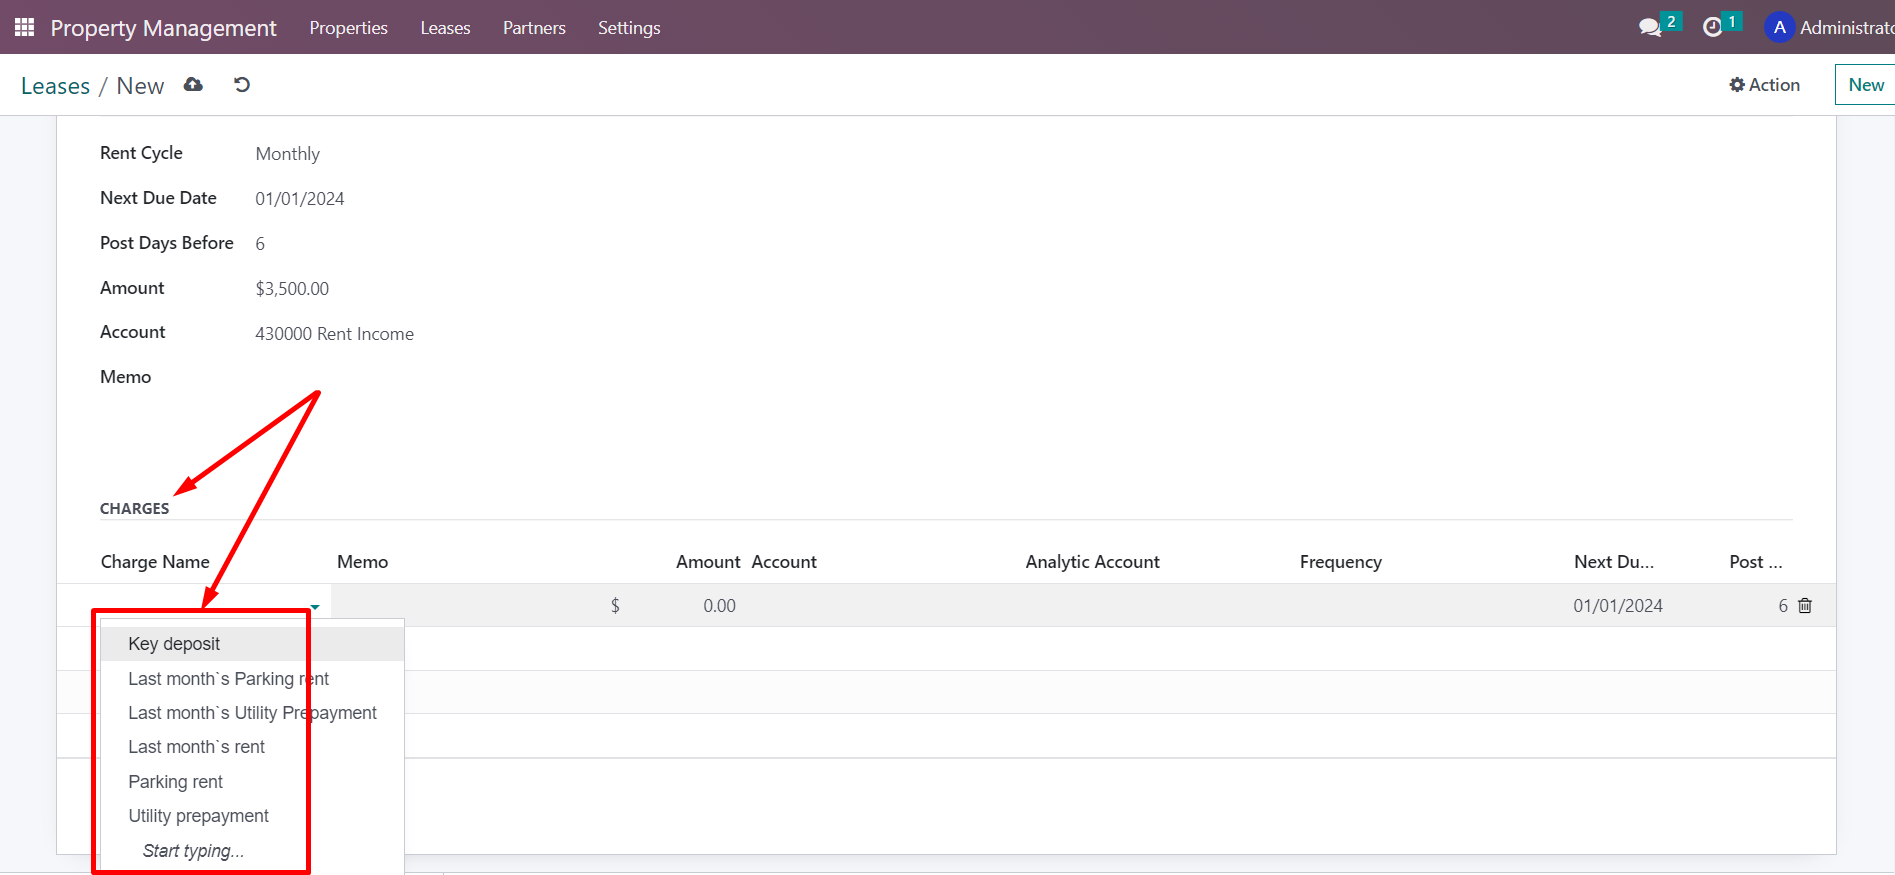
It is also worth noting that for additional charges, most fields are filled in automatically based on previously entered data and based on preset settings in the system. But all fields can be edited manually.
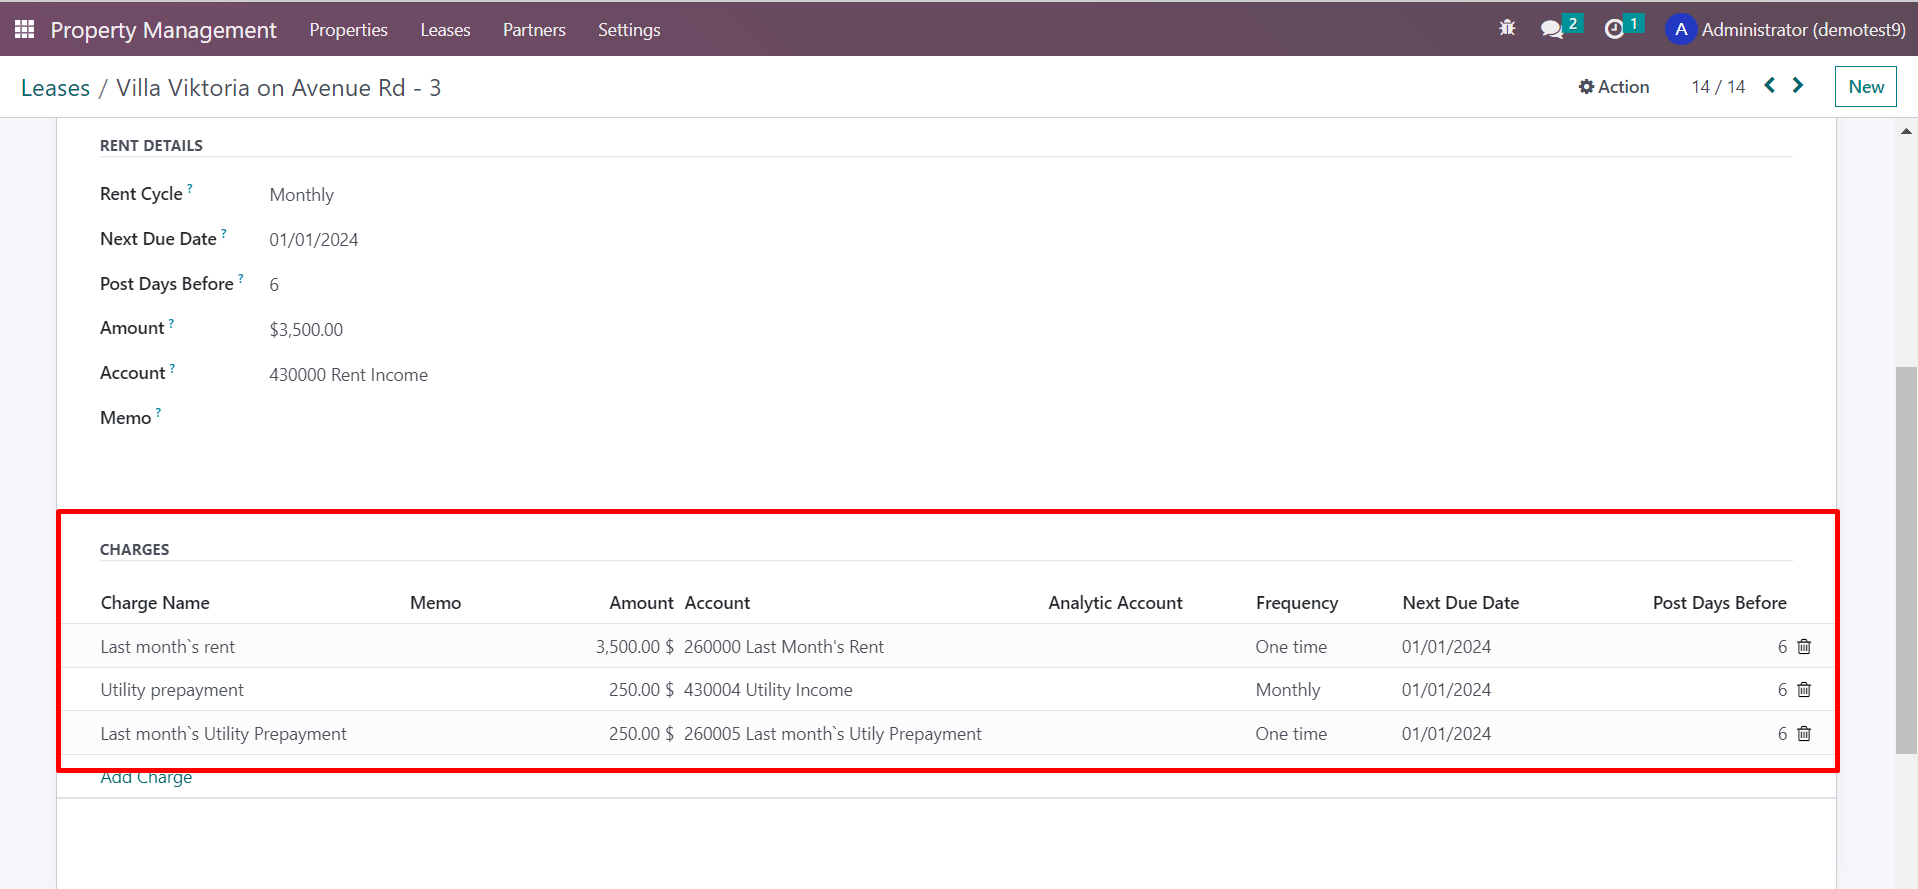
In some cases, the lease is signed right before the tenants move in and there is a need to create an invoice quickly so that the tenant can make the payment on time. To resolve this issue, we manually create an invoice using the "create invoice" button. Subsequent invoices will then be automatically generated.
Analytic
Accounts Report Tab
On the Analytic Accounts Report tab, you can view the rent charges and mutual settlements with the tenant for the utility bill under this lease, along with the current balance. This information is relevant for rented units where the tenant pays for the utility bill in addition to the rent. This tab does not need to be filled in manually, it will be filled in automatically.
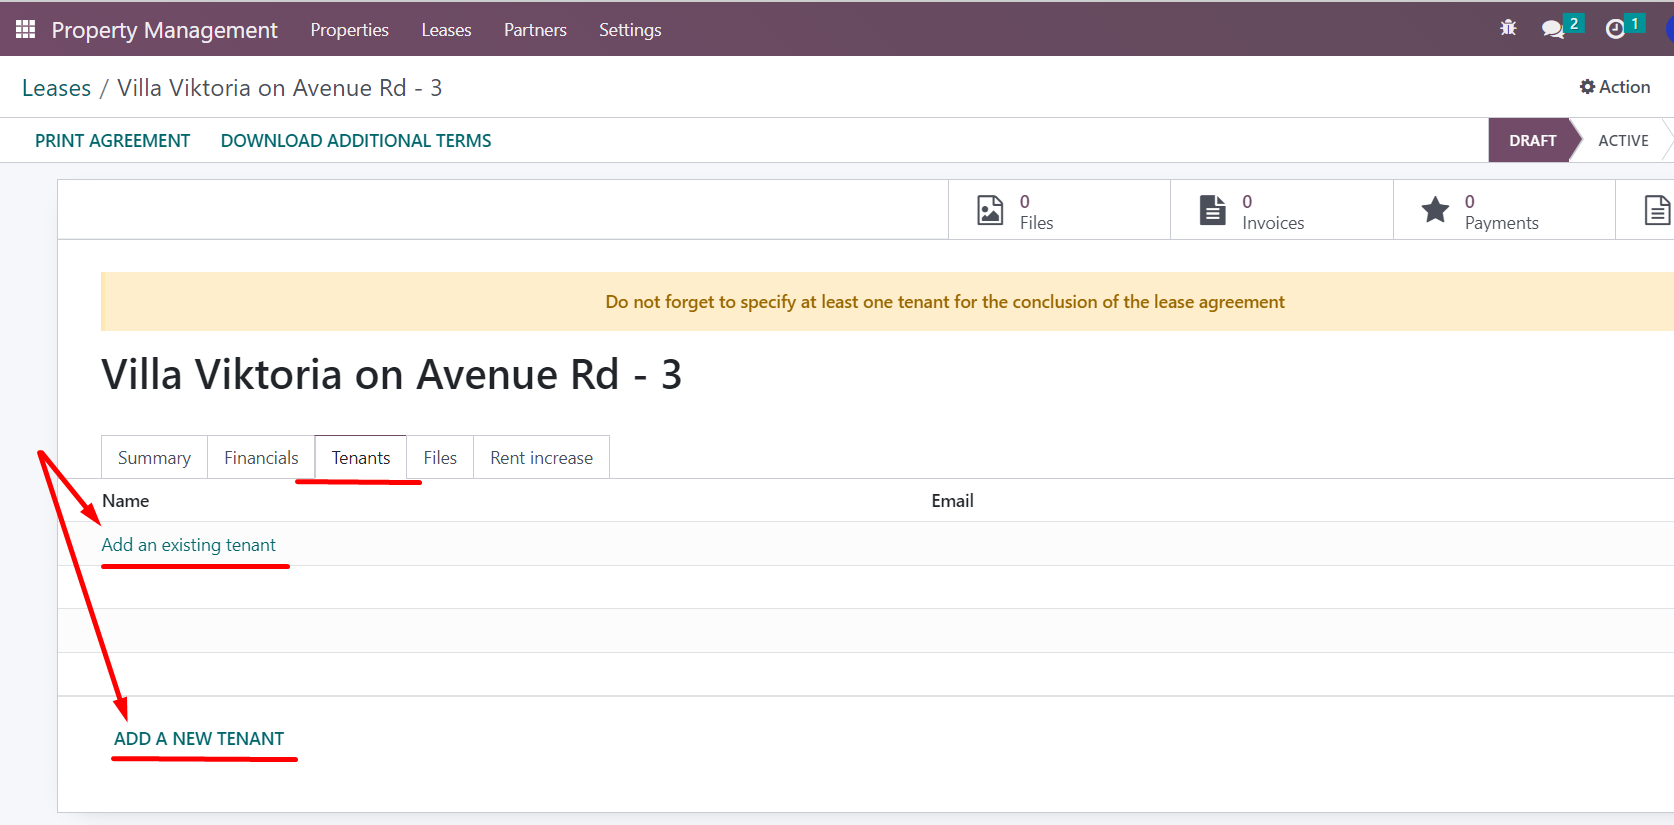
Tenants Tab
In this tab, we can see the list of tenants associated with a lease. We can either choose tenants from the existing list of tenants and applicants or create a new one. It is important to note that to finalize a lease agreement, at least one tenant must be specified. Therefore, if we don't specify any tenant, we can save the lease in the system as a draft. However, to activate the lease, we need to specify the tenant first.
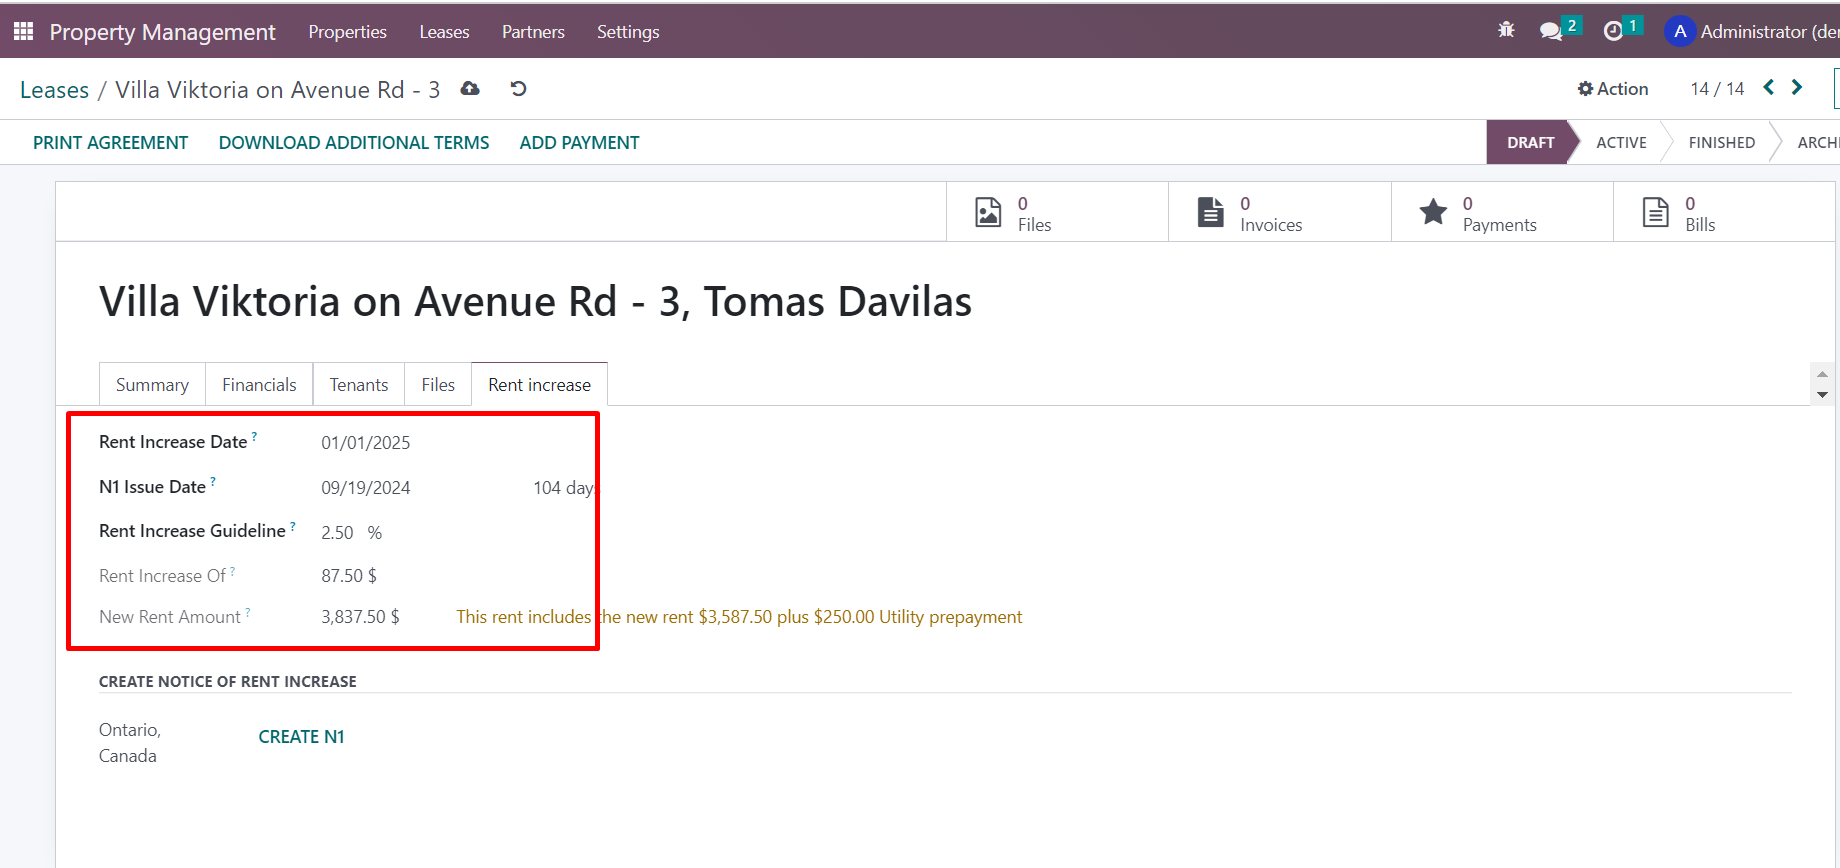
Rent Increase Tab
To make the process of increasing rent as convenient as possible for users, all the required information on this tab is automatically calculated and filled in based on the data from the lease agreement. However, if needed, users can also edit the information manually. We will provide a separate article explaining how to work with Rent Increase Notice (N1 Form)
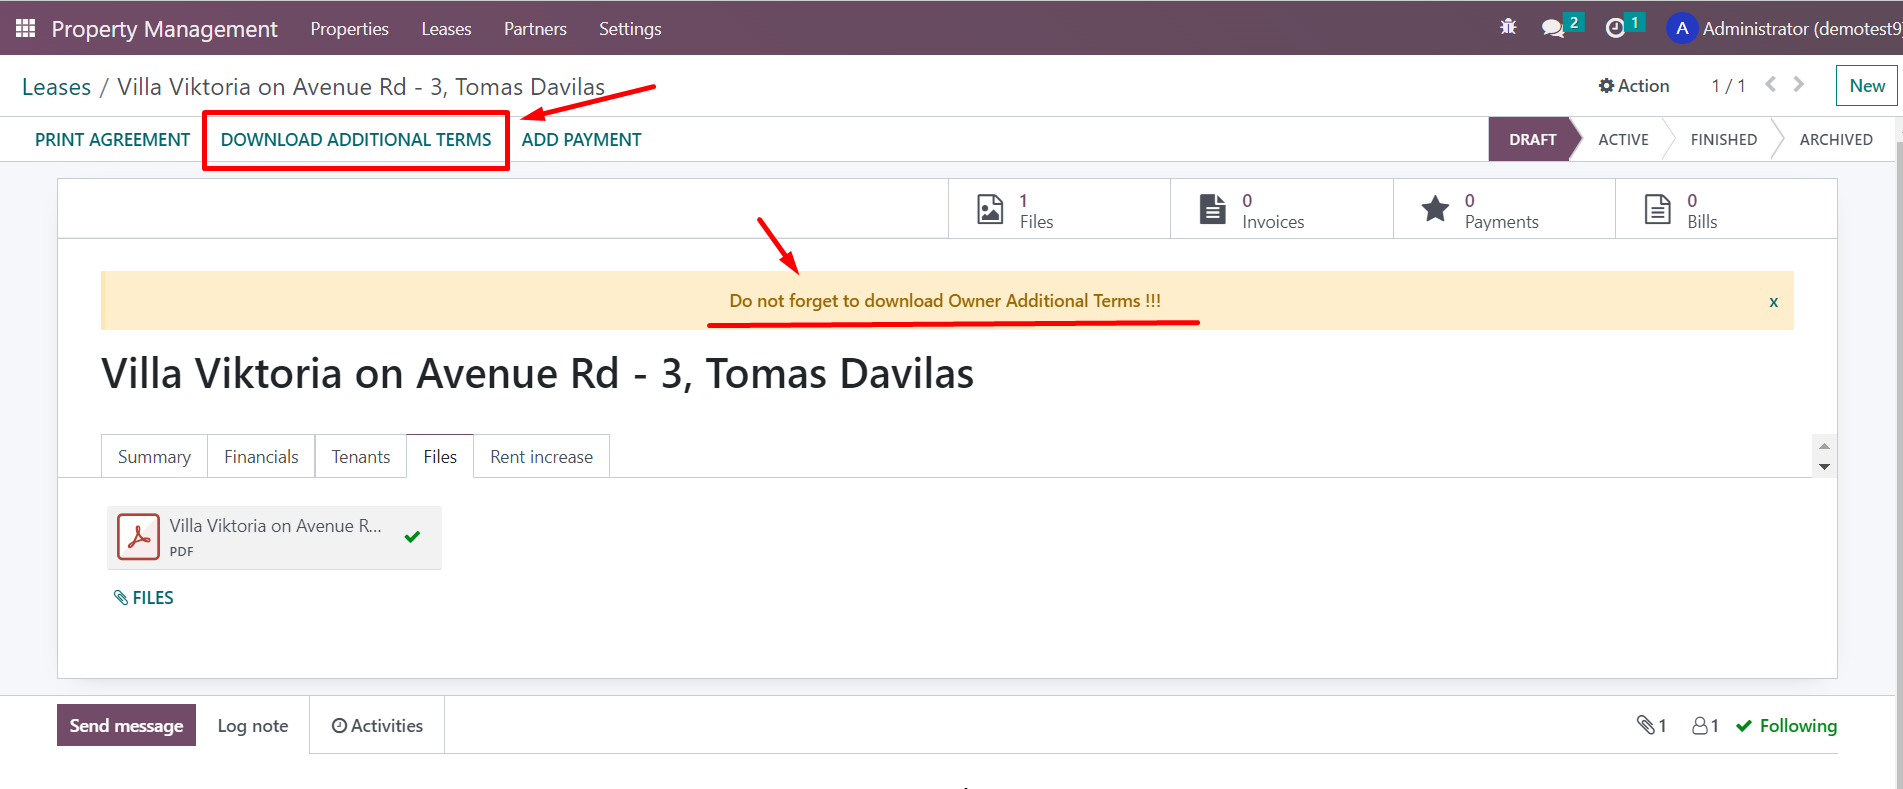
Once we have entered all the necessary information on the lease agreement card, we proceed to generate a PDF format of the official lease agreement form approved by the State of Ontario. The file is created using the "Print Agreement" button and is automatically saved in the "Files" tab. The data we fill in on the card is automatically transferred to the relevant fields in the lease. If required, any other data can be manually entered or modified.
If the landlord uses an additional agreement while concluding the lease agreement, then the landlord's card must include the template of this additional agreement. The system will remind you to create an additional agreement when you print the agreement file.