With our previous articles having gone over “Properties” and “Partners,” we can now move on to creating and managing leases under our menu section “Leases.”
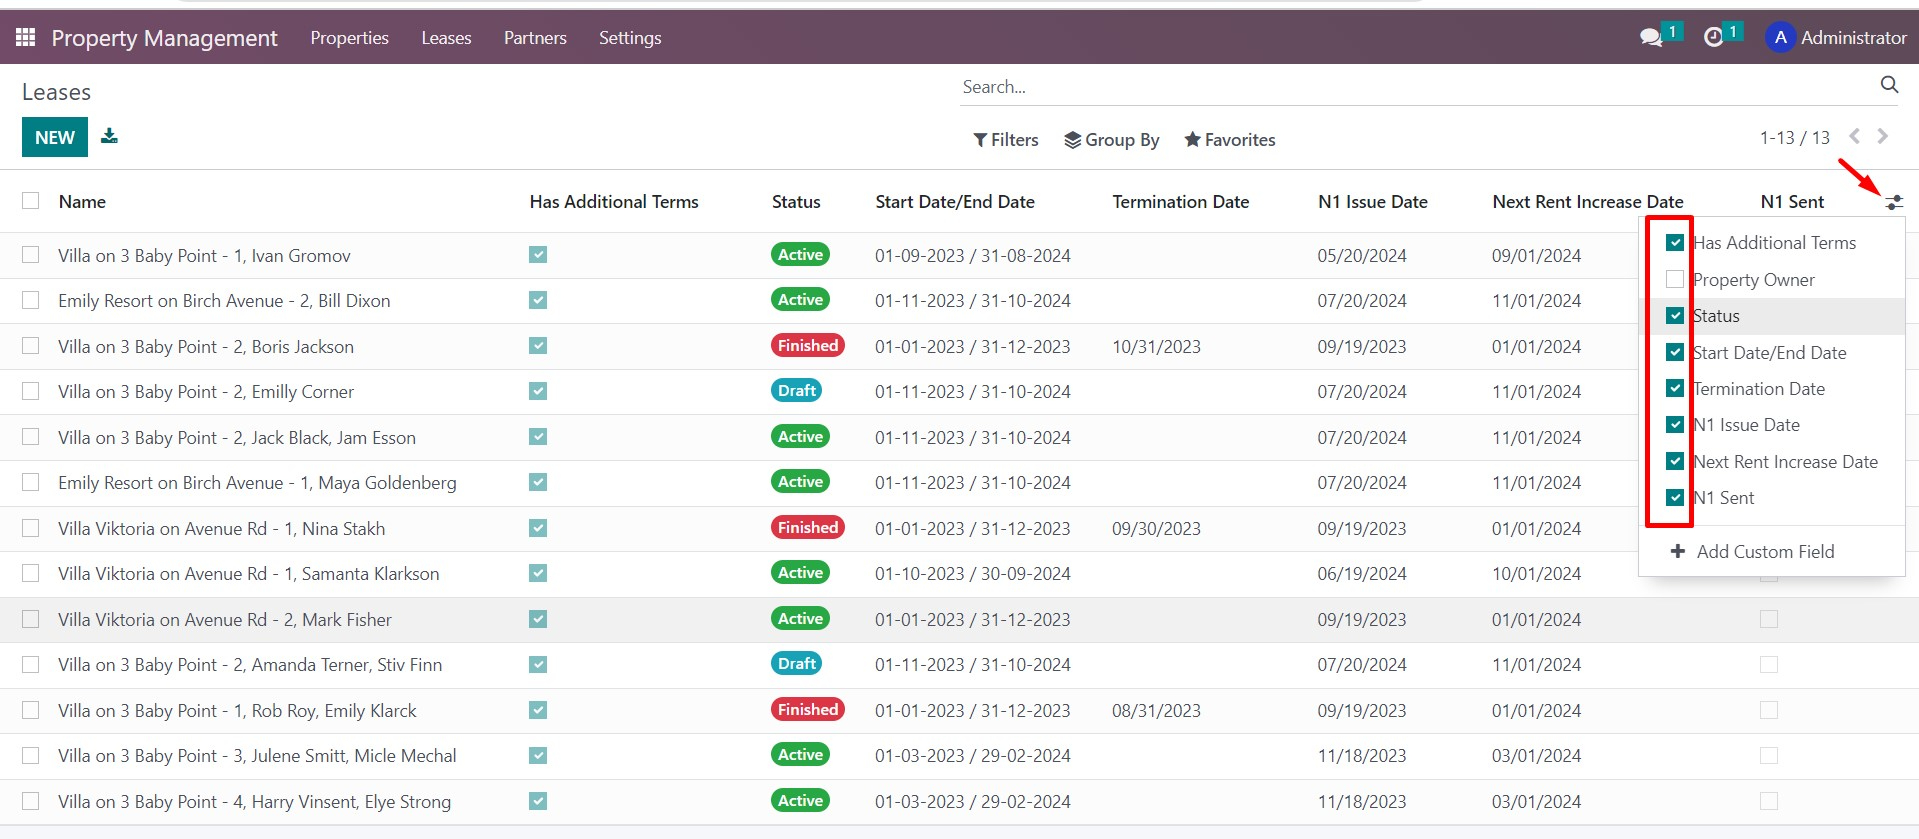
The system’s contracts register presents leases in list format, including the following main contract parameters displayed in the columns: status, start/end date, termination date, creation of the N1 form and other.
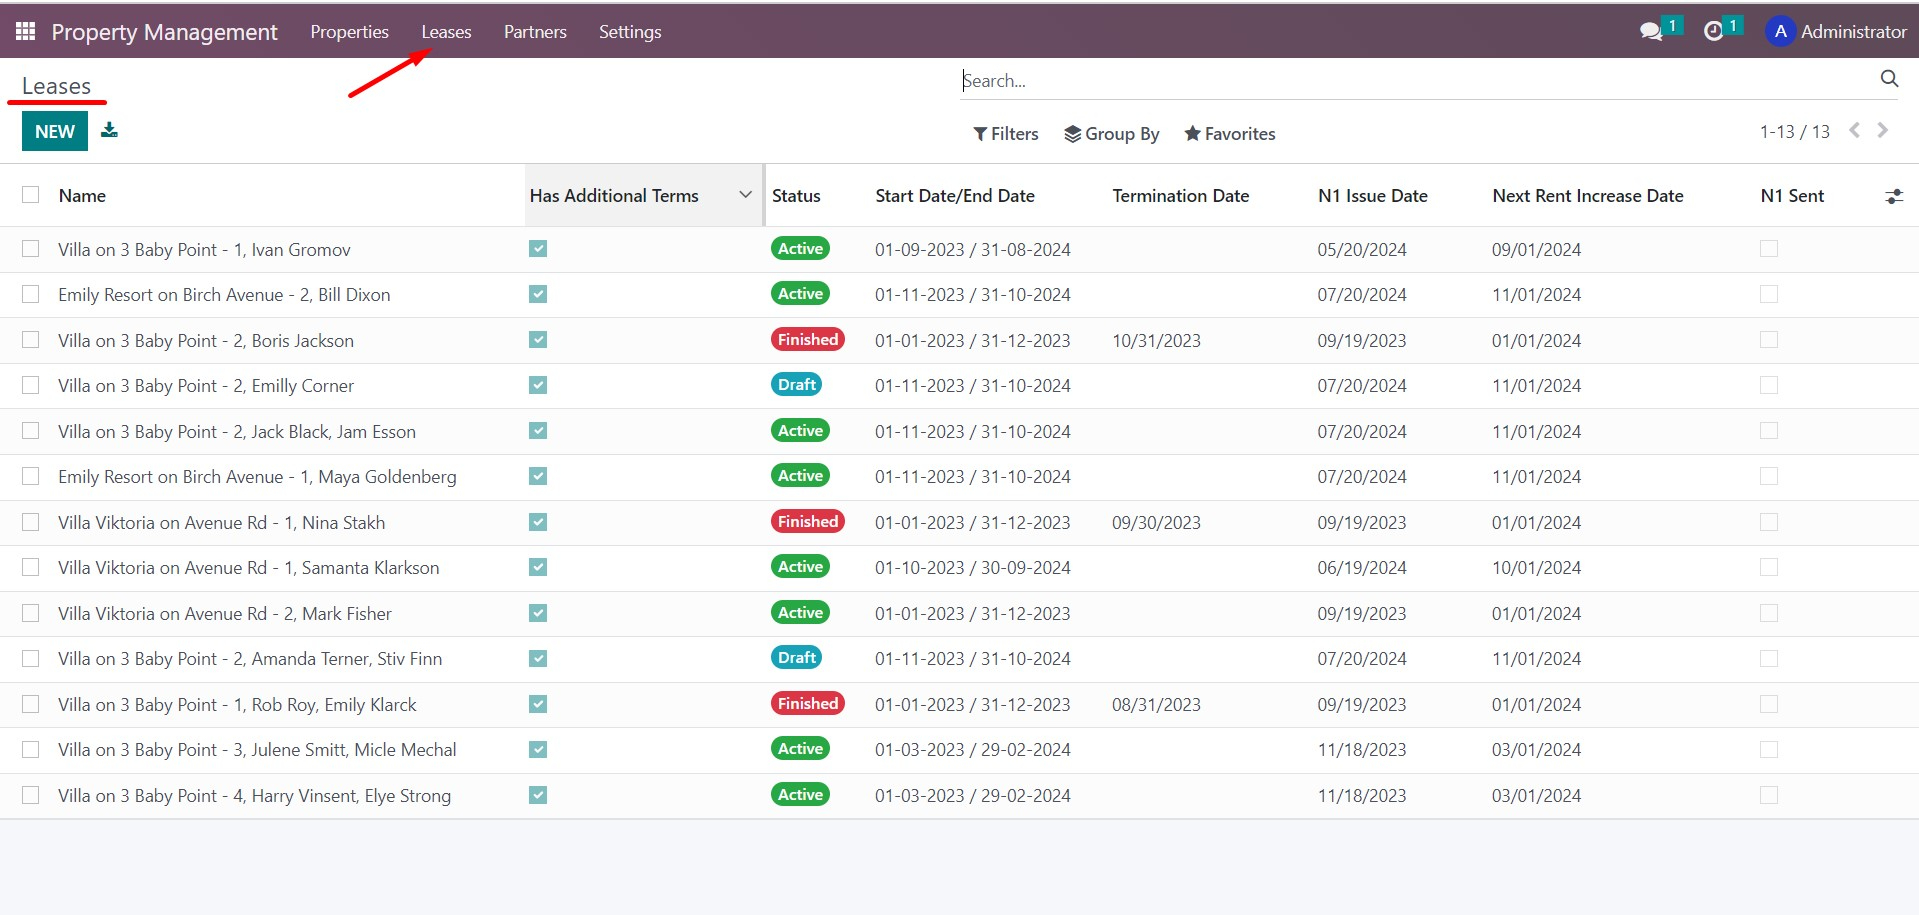
With the help of an additional categories button in the upper right corner, you can control the appearance of this list: add or hide parameters by turning them on/off in the check box.
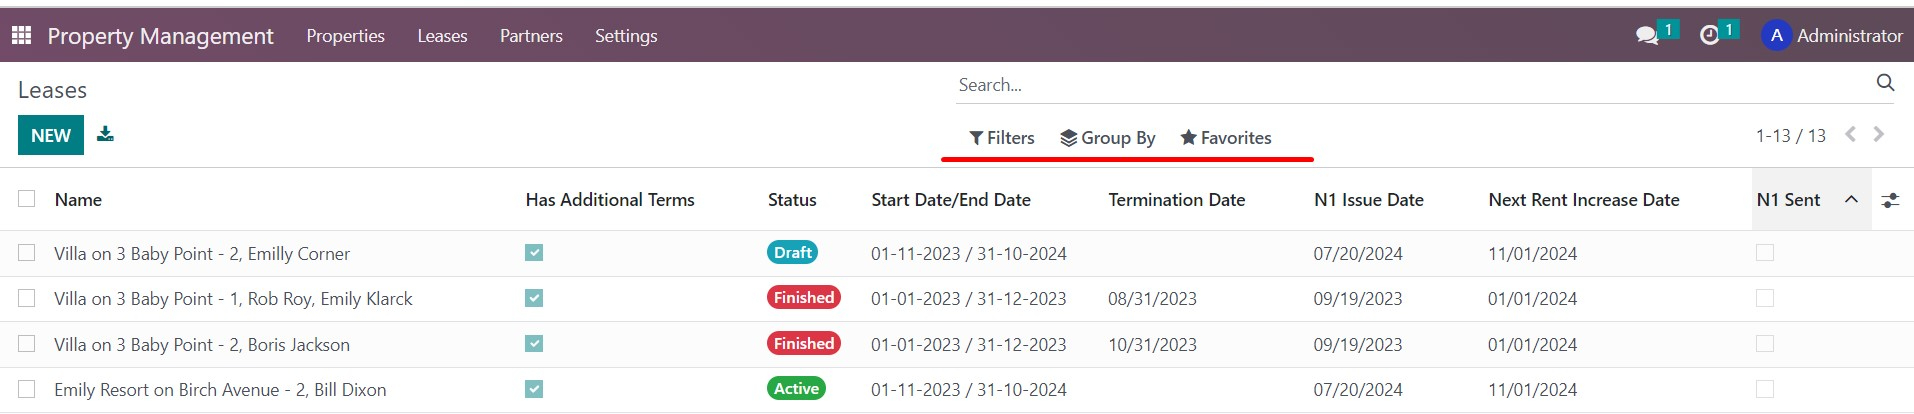
You can also filter or group the list of leases based on specific needs and save the selected options for yourself or other users.
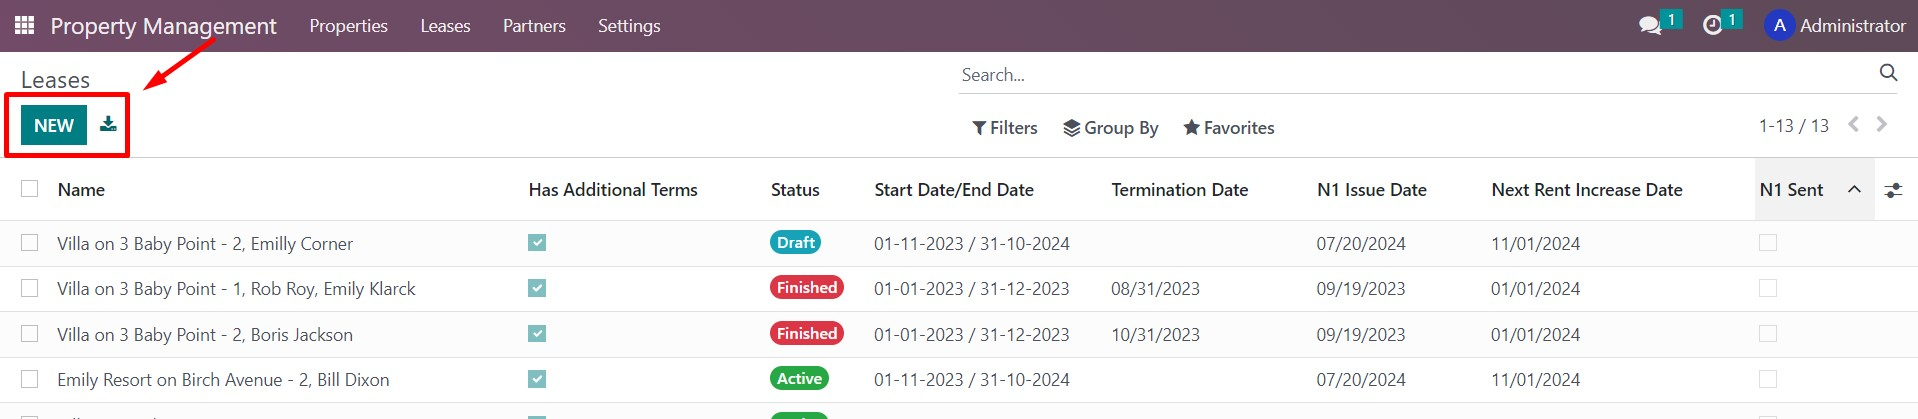
To create
a new lease or import leases from a prepared list, use the corresponding
buttons in the upper left corner.
This is
what the Agreement card looks like:

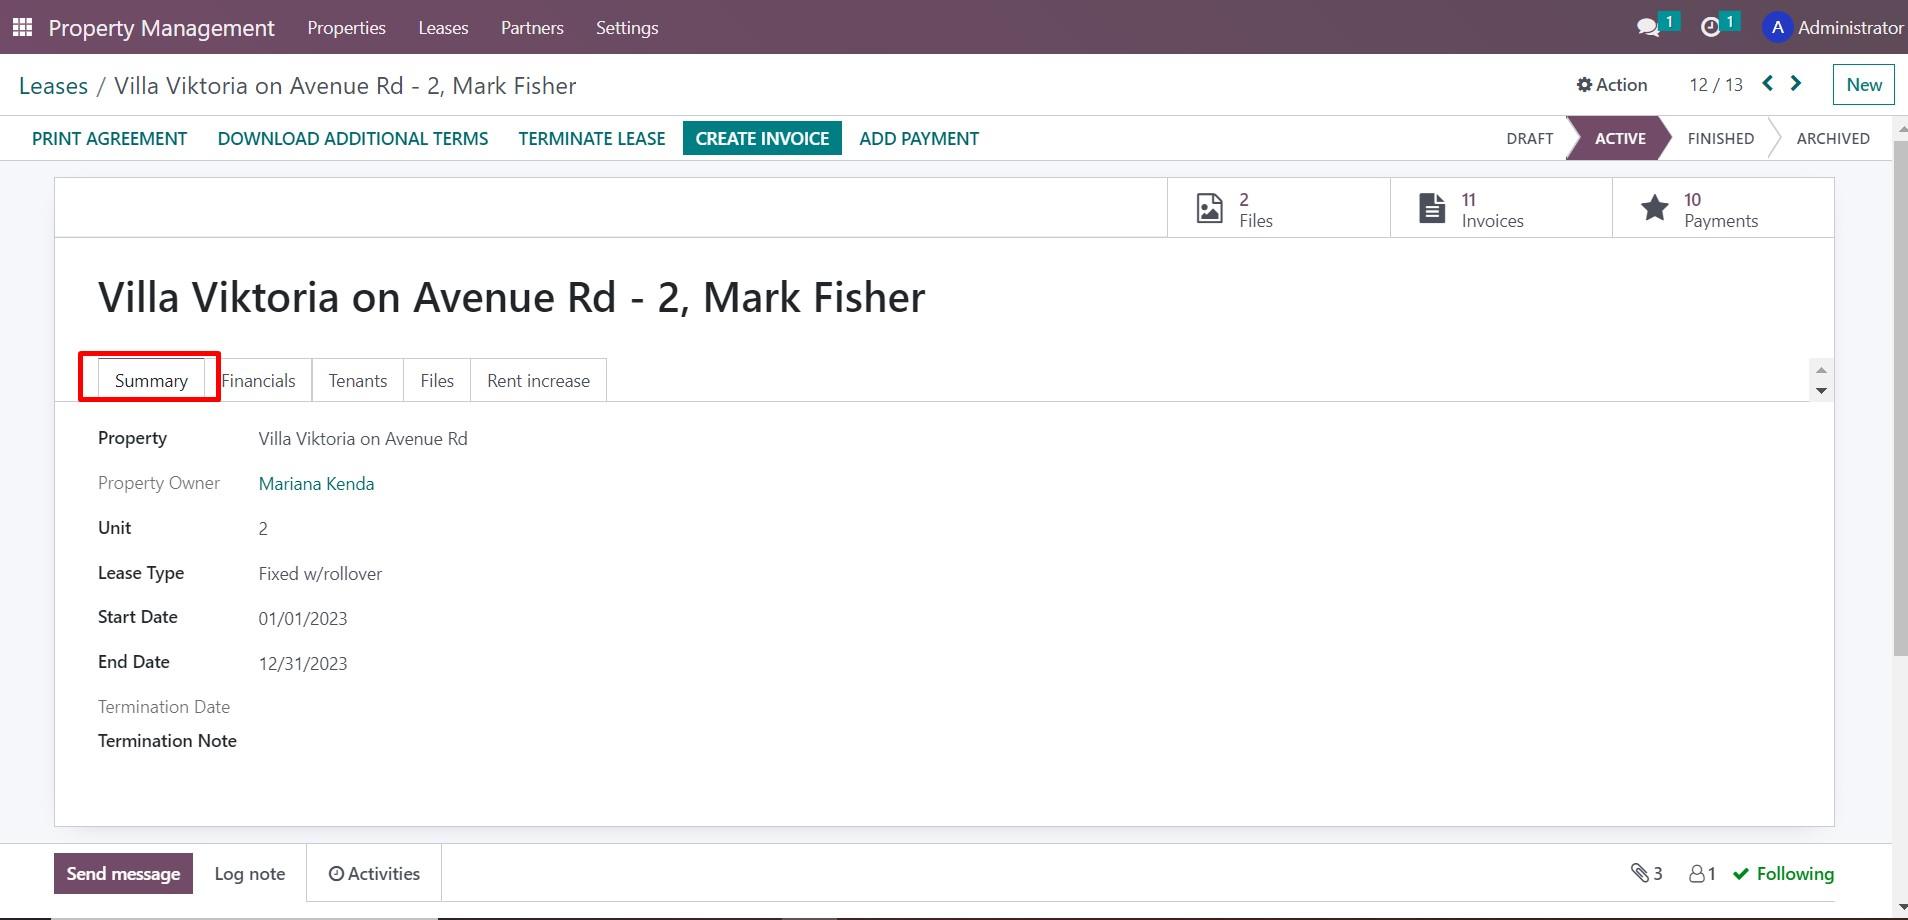
For convenience, the name of the Lease is generated automatically. It includes the name of the property, the unit number, and the names of the tenants.
When you view a Lease, you'll see five information tabs. Let's review each one.
The Summary tab displays information about the rental property, the owner, the type of lease, and its terms.
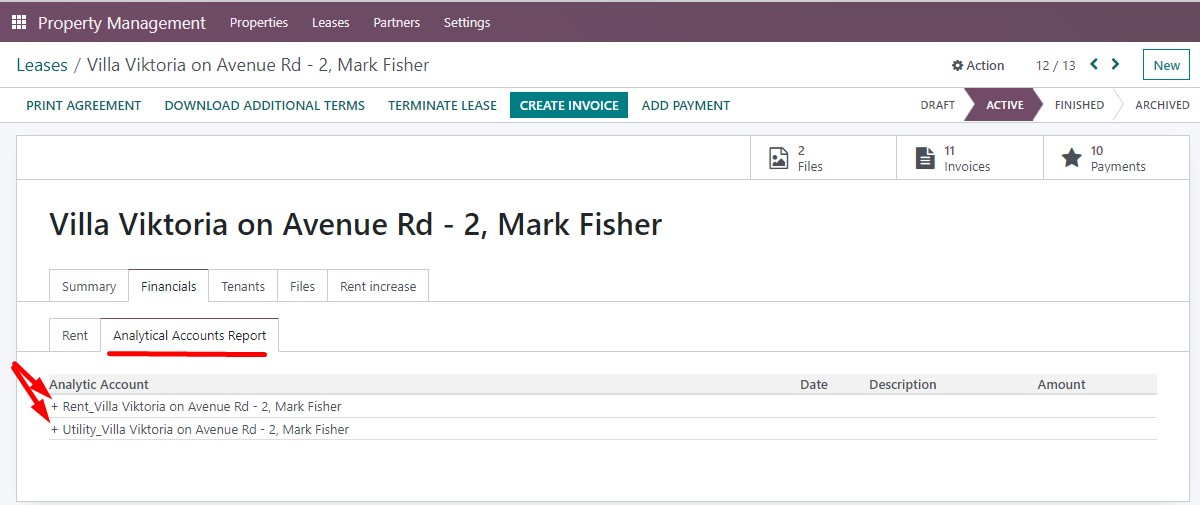
The Financials tab includes details about the rent conditions and any additional charges that may apply to the lease. Based on this information, the system automatically generates invoices for tenants, and checks and reconciles them with any existing prepayments received from the corresponding tenants

The Financials tab also shows mutual settlements of utilities and rent with tenants under the contract. These settlements are calculated automatically based on accounting data, which saves time and prevents manual calculation errors.
The Tenants tab displays a list of tenants. You can choose an existing contact or create a new one directly from this tab when concluding a Lease.

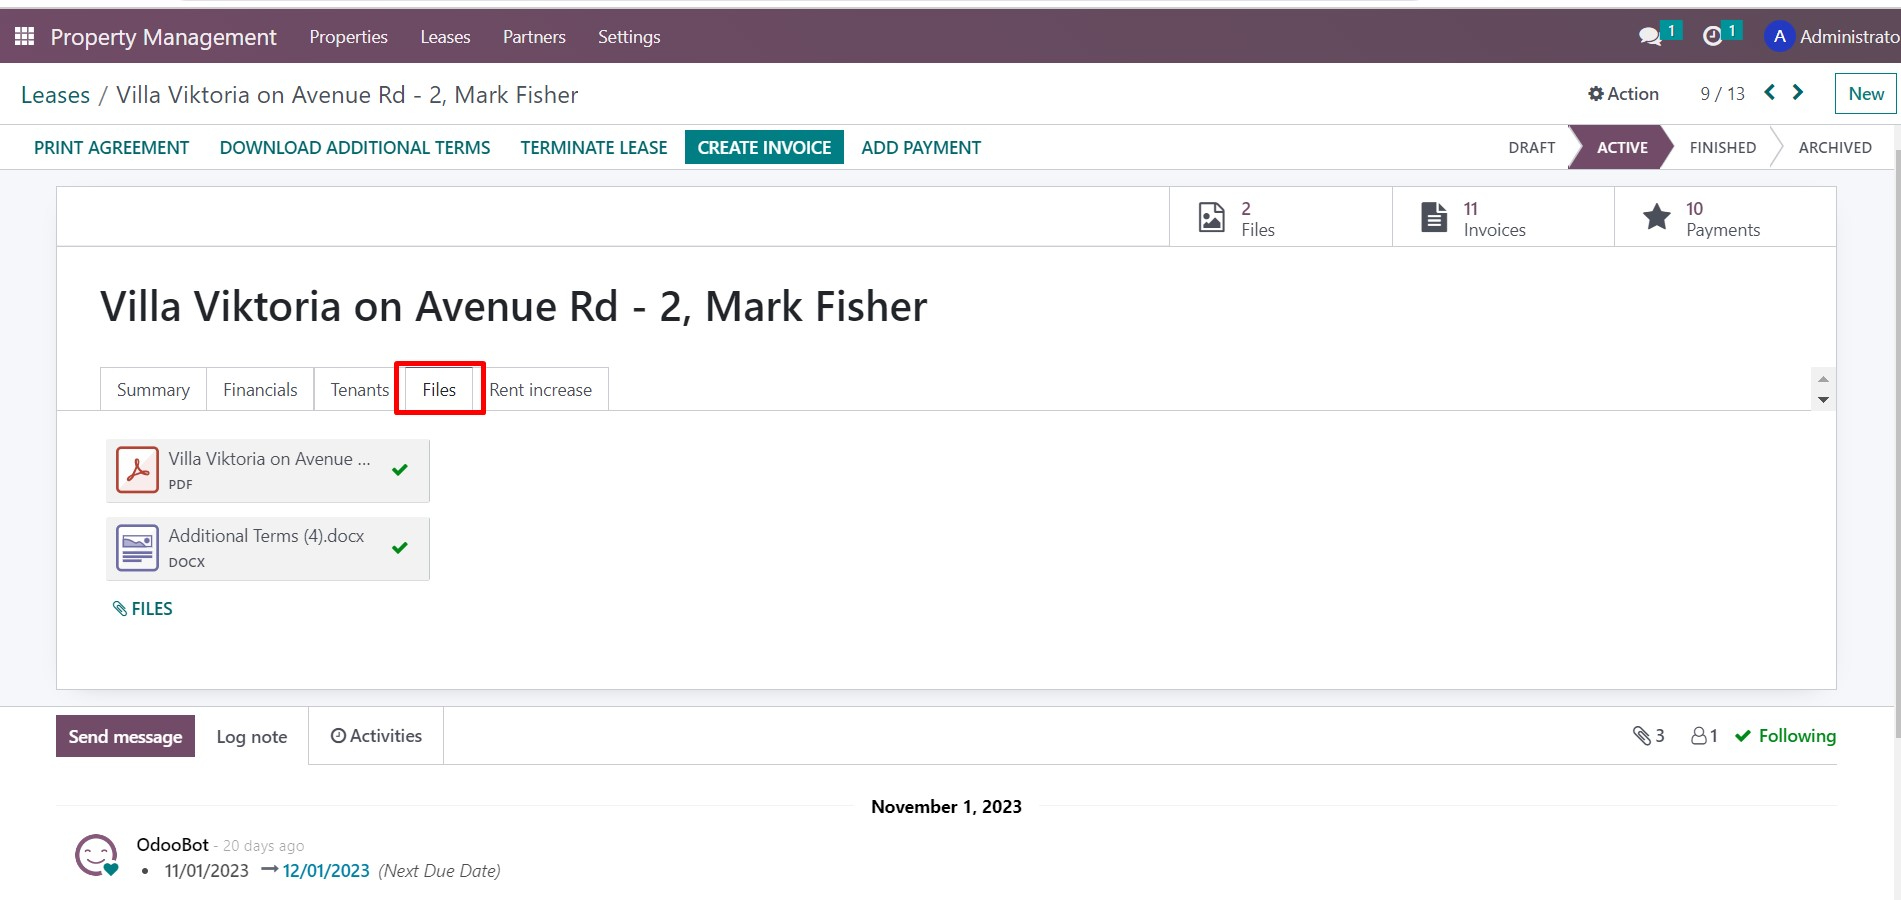
On the Files tab, you can store any files related to the corresponding lease agreement. Additionally, files related to the lease, such as additional agreements or N1 Forms, are automatically saved here during their creation.
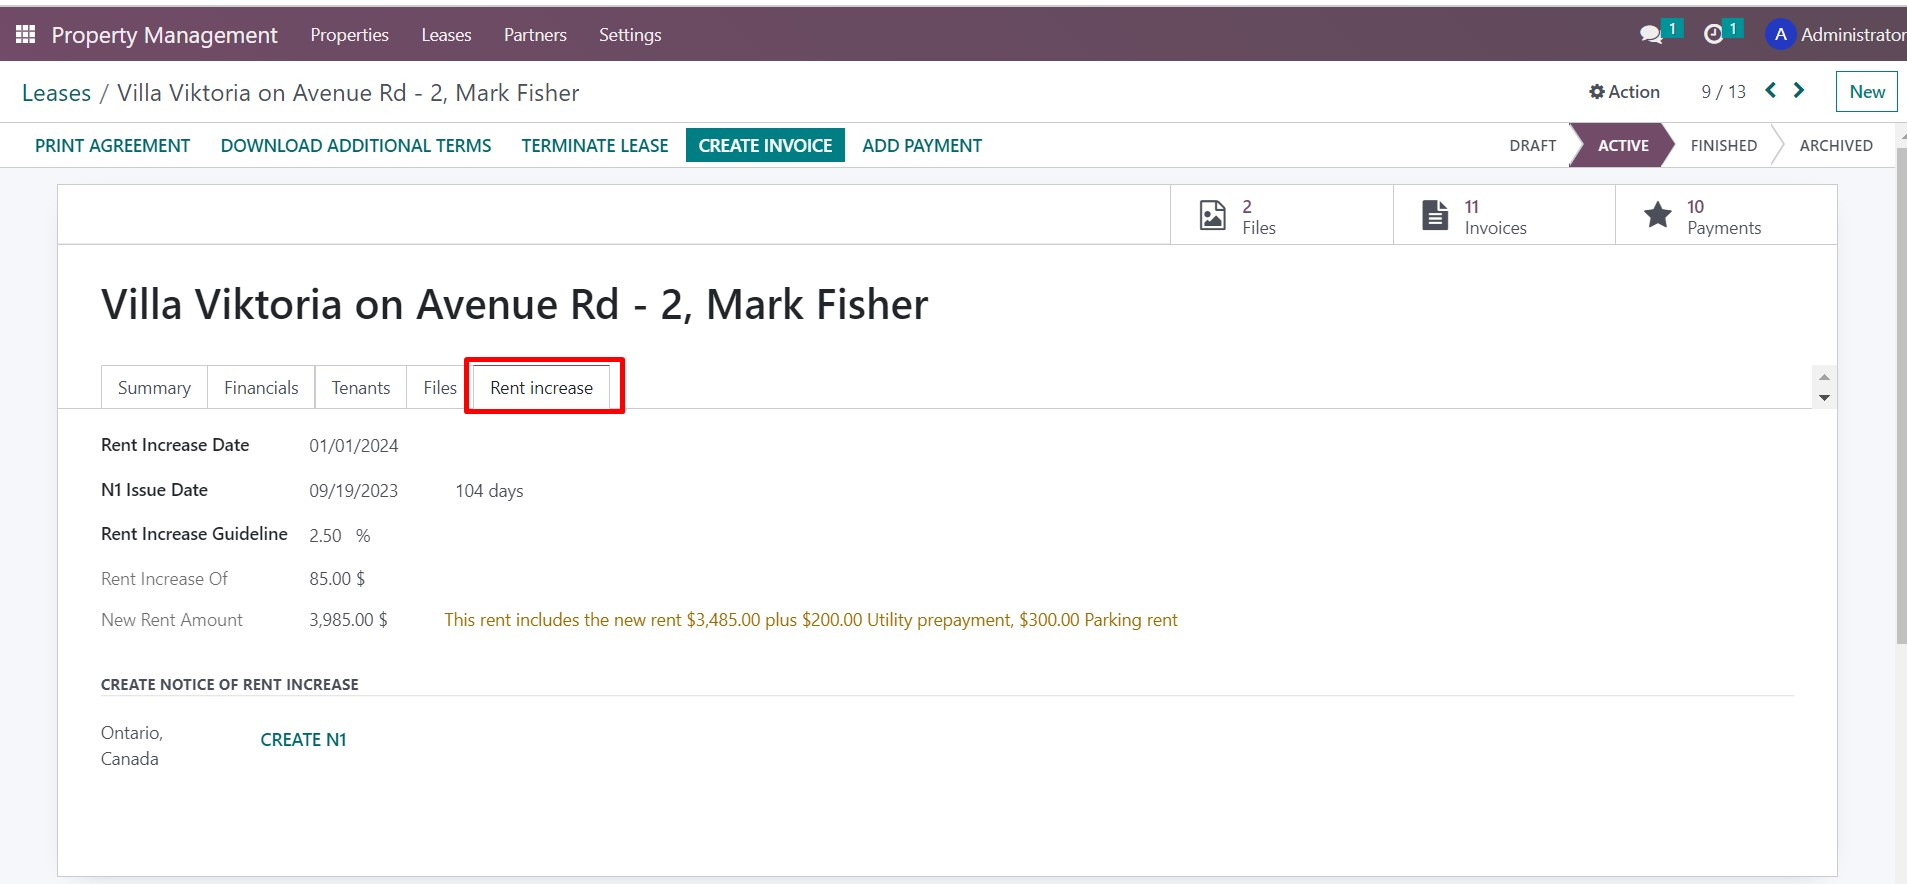
Finally, the Rent Increase tab is used to monitor and manage the process of increasing the minimum wage in accordance with Ontario legislation. It automatically calculates the date of rent increase, the issue date of the N1 Form, the percentage and amount of the rent increase, and the new amount of rent, and generates the N1 Form file automatically. You can also indicate the status of the N1 Form processing on this tab.
Above the Lease name on the upper right side, there are smart buttons that provide easy access to the list of payments, invoices, and utility bills associated with that lease.
All relevant data can be directly viewed from the property management module, allowing for convenient navigation to accounting information and seamless workflow.
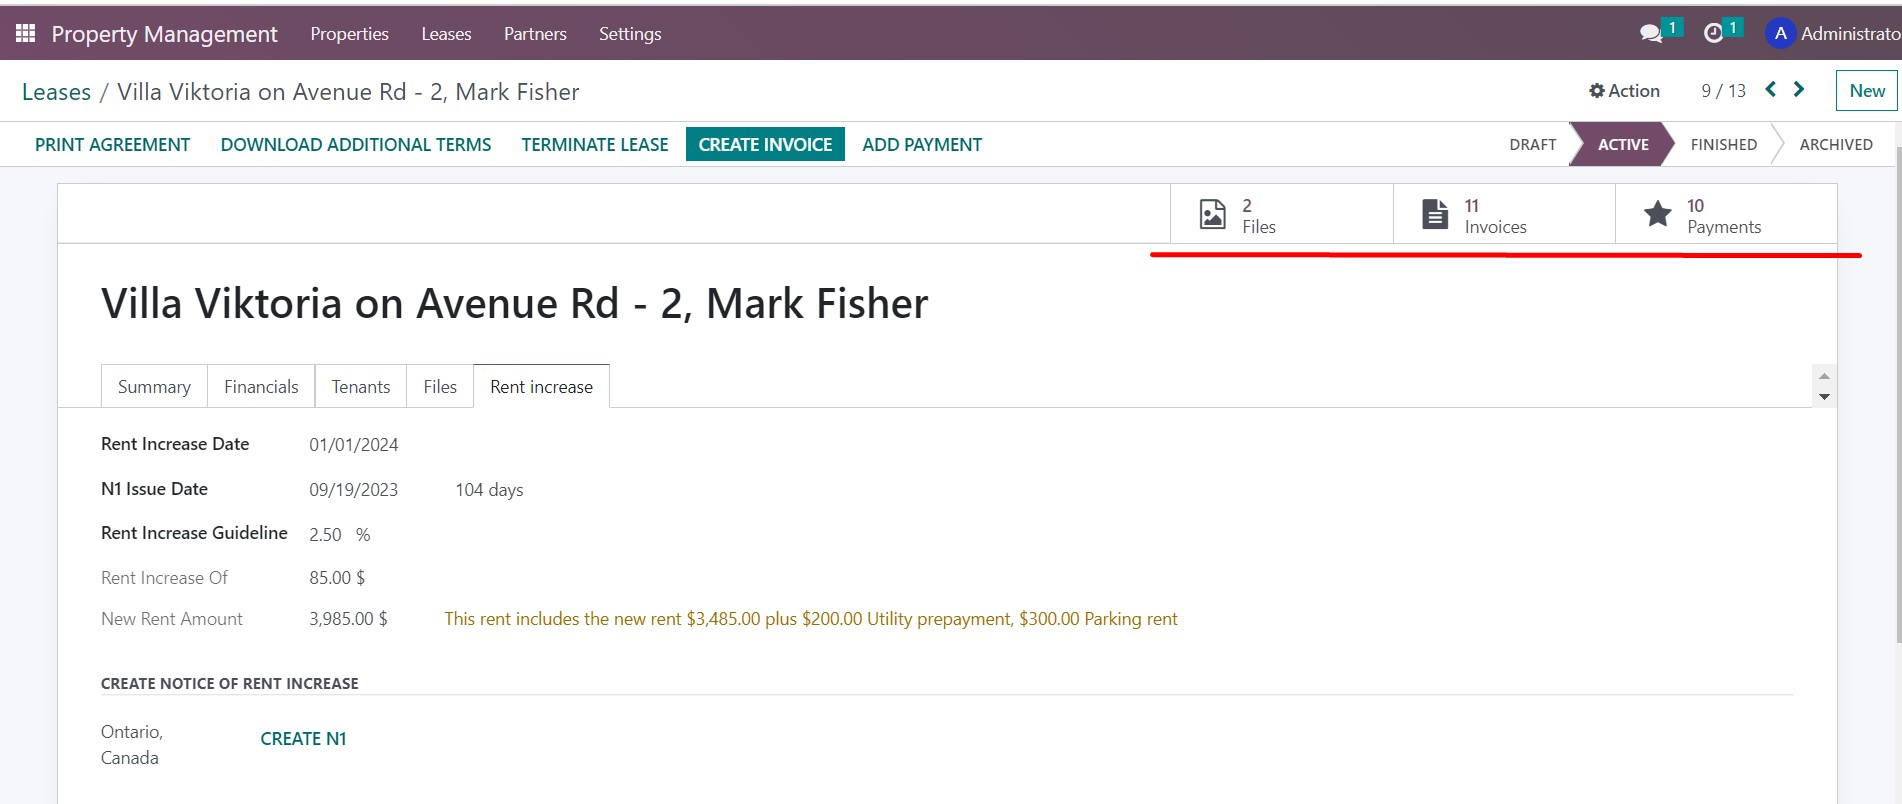
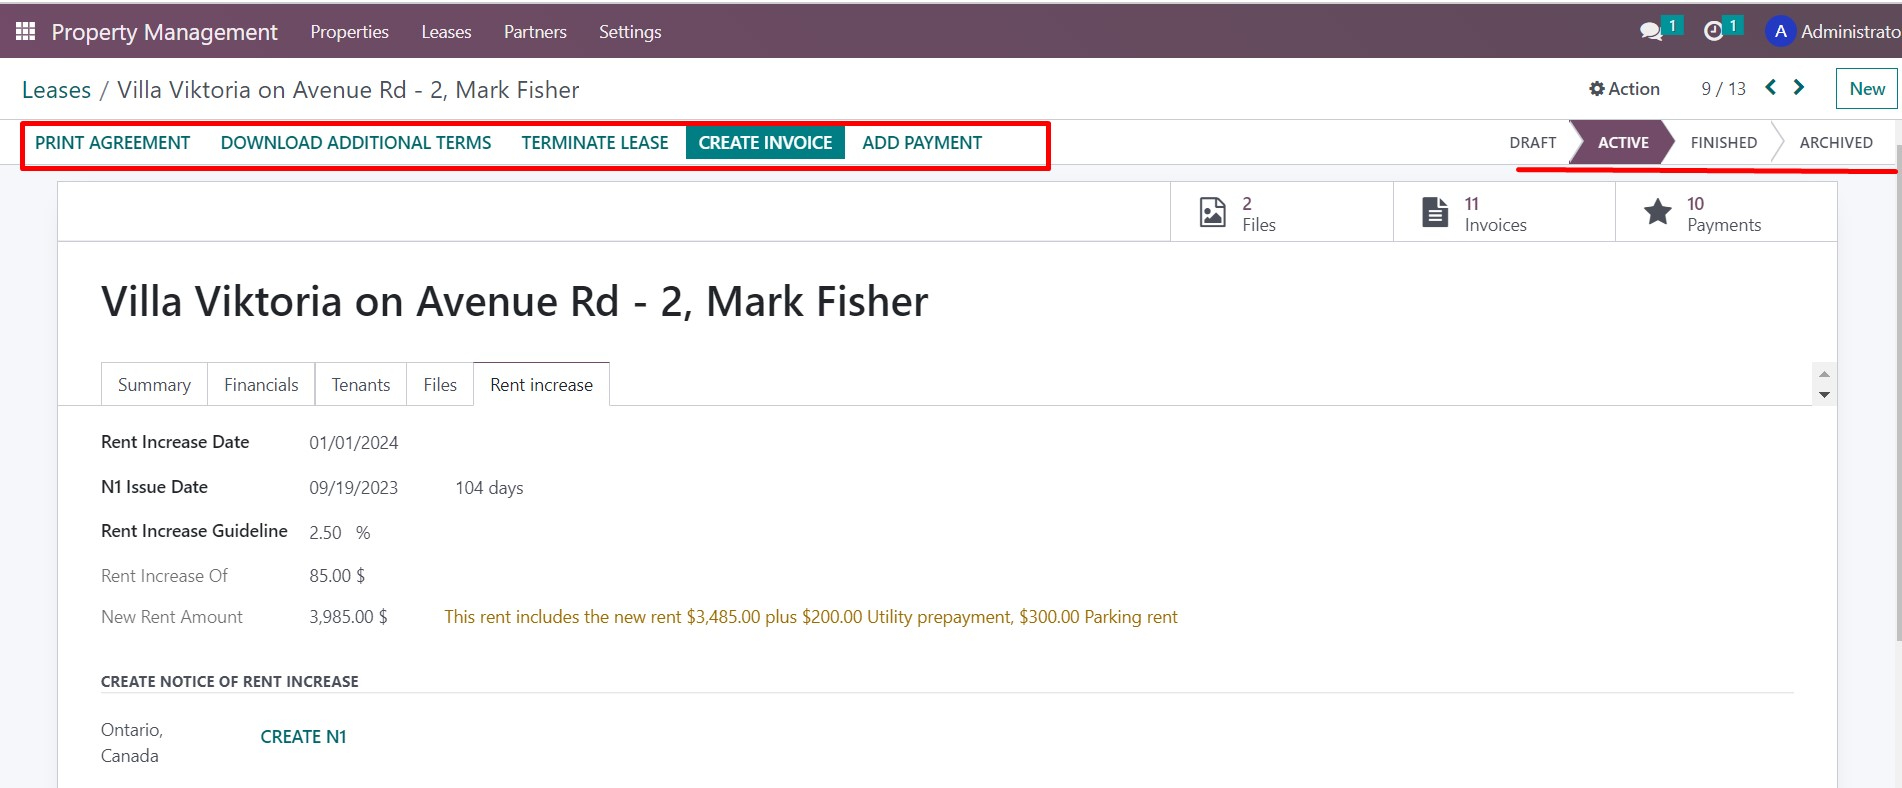
A scale at the top left corner of the lease card displays the current status of the lease, whether it is drafted, active, finished, or archived
On the upper panel of the card, located on the right side, there are several buttons that allow us to perform various actions. We can use these buttons to create document files automatically, set the lease end date, add tenant payments, or create an invoice manually if needed.
The Property Management App allows for streamlined management of property objects and lease agreements. Allowing for convenient all-in-one access to accounting data, users can work uninterrupted and efficiently.